
Livesync Desktop
Use your persona as a webcam called Livesync Camera in Zoom, Google Meet, Teams, Discord and more, with no OBS setup.
Livesync Desktop puts your persona in any app as a regular webcam called Livesync Camera. Zoom, Google Meet, Microsoft Teams, Discord, OBS and anything else that lets you pick a camera can use it. No OBS setup, no browser source, no virtual audio driver.
It runs the same studio you know from the web, in its own window, so your personas, plan and settings are already there.
Step 1: Download & Install
Download Livesync Desktop from live-sync.io/download.
- macOS (13 Ventura or later): open the
.dmgand drag Livesync into yourApplicationsfolder, then open it from there. - Windows (10 or 11): run the installer and click
Yeswhen Windows asks for permission. That's what adds Livesync Camera to your system.
Sign in with your Livesync account. You'll land straight in the studio.
Step 2: Allow Livesync Camera (Mac only)
The first time you open the app, macOS asks you to approve the camera extension once.
- Open
System Settings→General→Login Items & Extensions. - Scroll to
Camera Extensions, click theⓘnext to it and turn on Livesync.
💡Tip: Until it's allowed, the dot on the
Virtual Cambutton is red and its card shows aSet up Livesync Camerabutton.
Step 3: Start a Session
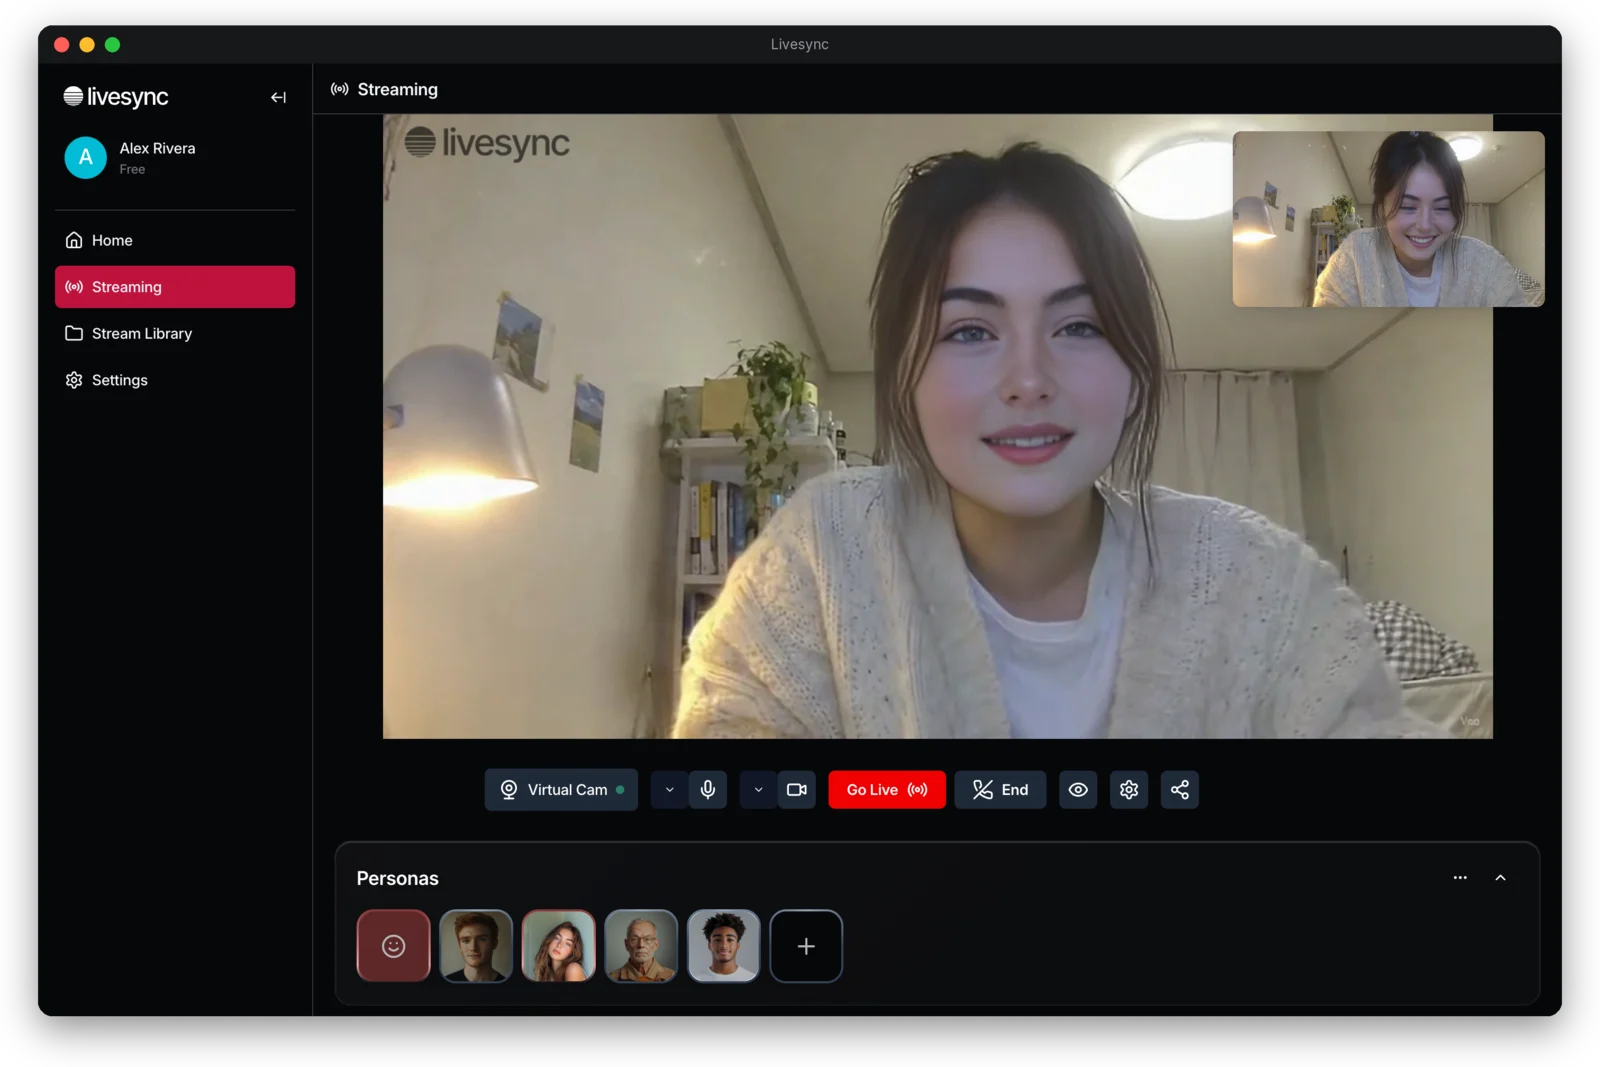
- Click
Backstageto start a session. - Pick your persona. After a few seconds you'll see it applied in the studio.
The dot on Virtual Cam turns green when your persona is live in Livesync Camera.
Step 4: Choose Livesync Camera in Your App
Open your call or streaming app and select Livesync Camera as the camera:
- Zoom:
Settings→Video→Camera→Livesync Camera - Google Meet:
Settings→Video→Camera→Livesync Camera - Microsoft Teams:
Settings→Devices→Camera→Livesync Camera - Discord:
User Settings→Voice & Video→Camera→Livesync Camera - OBS: add a
Video Capture Devicesource and chooseLivesync Camera
Keep your microphone as it is. Livesync Camera carries video only.
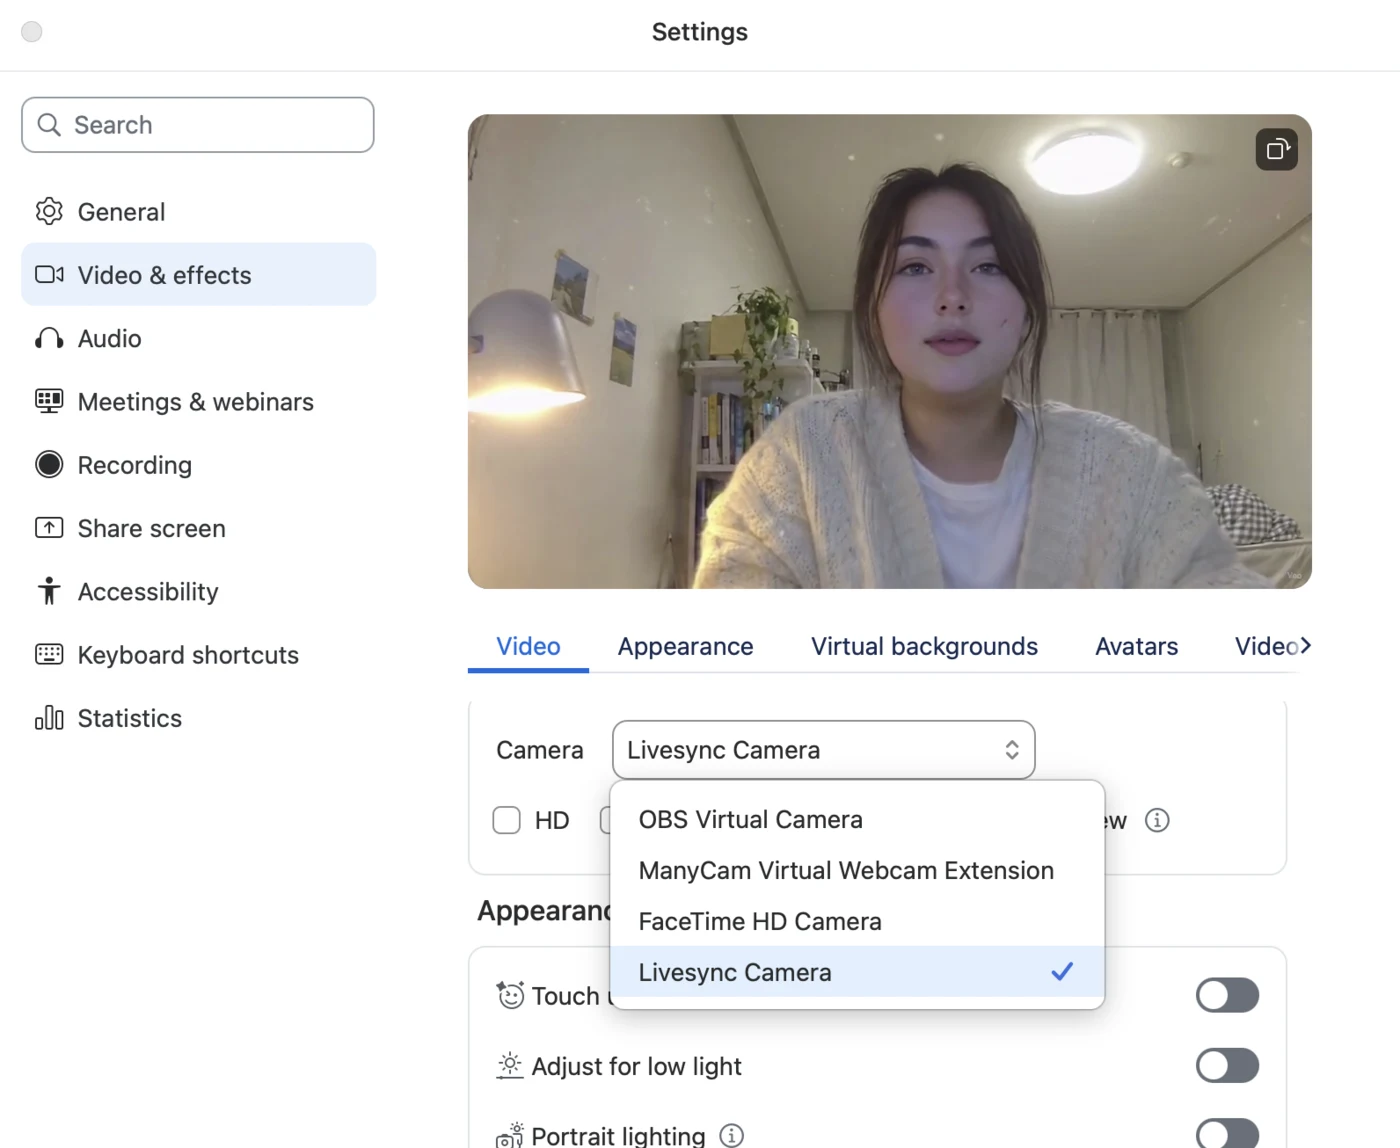 Zoom: Settings → Video & effects → Camera
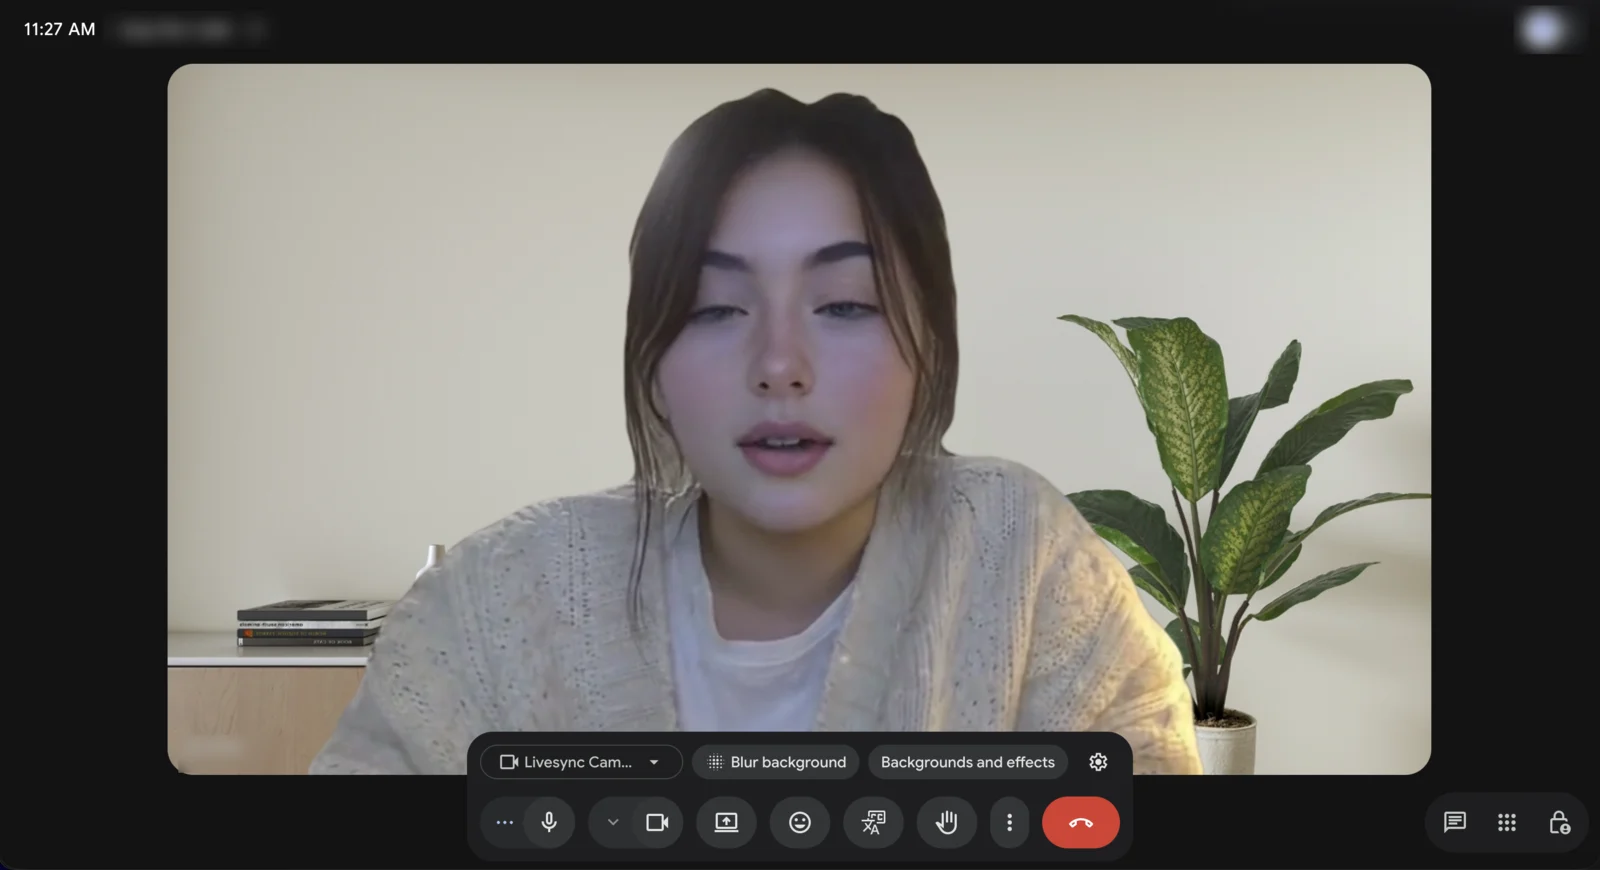 Google Meet: the camera menu in the call or on the pre-join screen
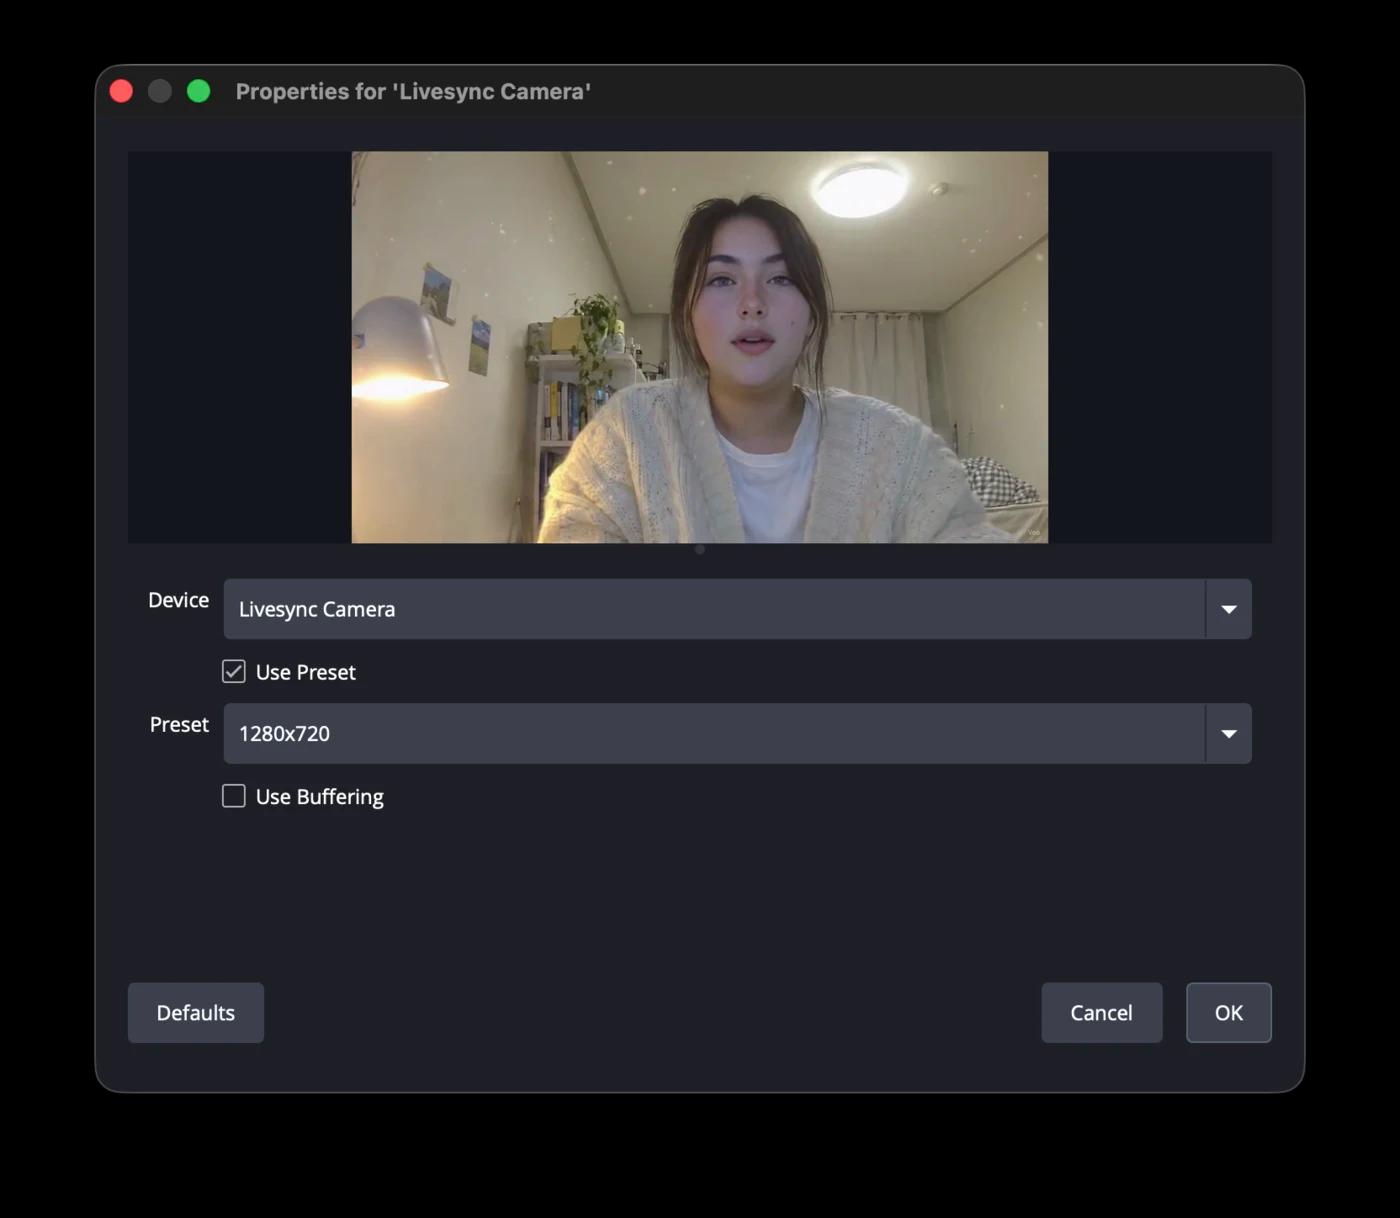 OBS: a Video Capture Device source with Livesync Camera as the device
Step 5: The Virtual Cam Button
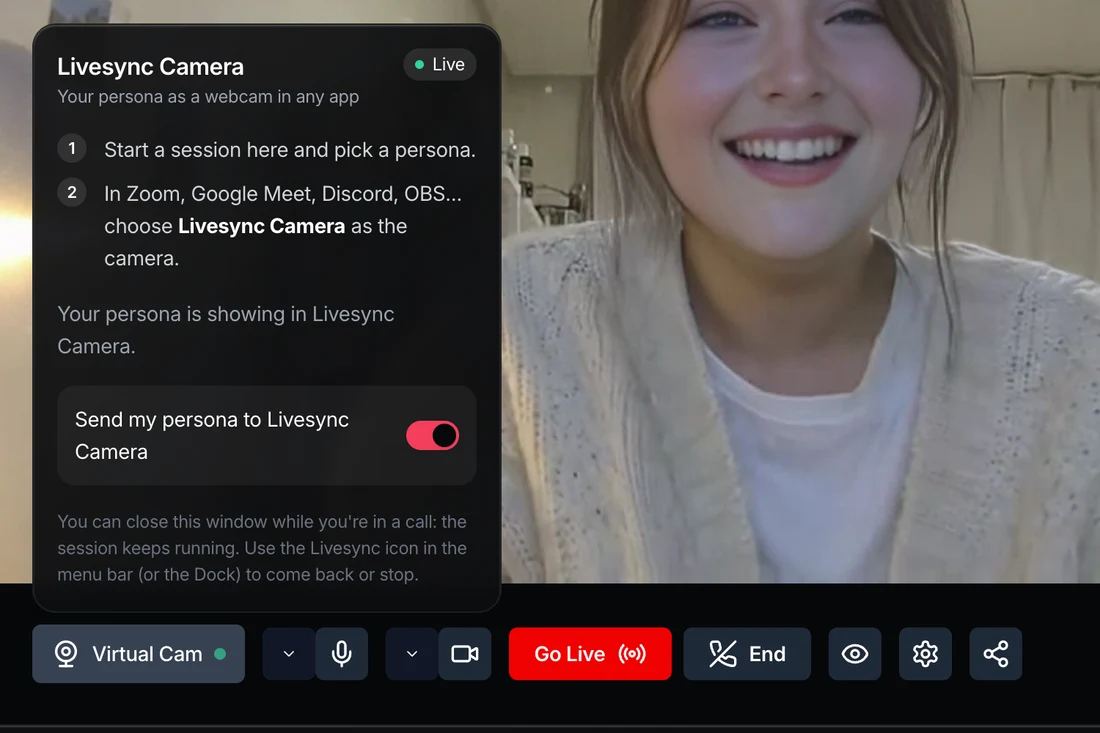 Click
Virtual Cam next to your microphone and camera controls to see what Livesync Camera is doing:
- Green: your persona is live in Livesync Camera.
- Amber: the session is getting ready.
- Grey: the camera feed is turned off. Use the switch in the card to turn it back on.
- Red: Livesync Camera needs your permission (see Step 2).
When no session is running, Livesync Camera shows a Livesync placeholder card instead of a frozen image.
Keep It Running in the Background
You can close the Livesync window while you're in a call. The session and the camera keep running.
- On macOS, use the Livesync icon in the menu bar (or click the app in the Dock) to start, stop, go live, switch personas or open the window.
- On Windows, use the Livesync icon in the system tray.
- To stop everything, choose
Quit Livesyncfrom that menu.
Troubleshooting
- Livesync Camera isn't in my app's camera list. Quit that app completely and open it again. Apps that were already running when you installed Livesync may not notice the new camera until they restart.
- Microsoft Teams on Windows doesn't list Livesync Camera. The new Teams app on Windows doesn't support some virtual cameras yet. Use Teams in your browser (teams.microsoft.com in Chrome or Edge), where Livesync Camera works.
- My app shows the Livesync placeholder card. Start a session in Livesync and make sure the
Virtual Camdot is green. - My voice arrives slightly before my video. Your app uses your microphone directly, while video goes through Livesync. For streams that need picture and sound perfectly in sync, use the OBS guide, which lets you delay the audio to match.
🚀 That's it. Pick Livesync Camera and your persona joins the call.